For whatever reason, you want to delete a Facebook page, if you are wondering how to delete a Facebook Page, then you may refer to the steps in this post.
If you are managing a Facebook Page, then you may already know that Facebook Profile or in other words, Facebook Account and Facebook Pages are different. If you are unsure, then let’s see some basic difference between Facebook Profile and Facebook Page in very simple way.
- Facebook Profiles are personal – you can share information about yourself, such as your views, photos, videos, current city, home town etc.
- Facebook Pages are for businesses, organizations, for any commercial use or cause.
Eg. Facebook Page for yourself as a public figure, for a website, or for your local business, school etc. It represents the entity that you want to represent, not the personal you. - You can create a Facebook Page with your personal Facebook account – it is a per-requisite that you have a Facebook Account to create a Facebook Page. After you create a Facebook Page, you can switch account to that Page to manage the Page. So, you act as ‘the Page’ and not your personal account in that case.
Table of Contents
How to Delete a Facebook Page Using a Desktop Browser
Deleting a Facebook page can be a necessity for many reasons. Whether you’re a business owner looking to close a page or an individual wanting to remove a page you no longer need, we will see the steps to delete a Facebook page using a desktop browser. The navigation of menus may vary on mobile Facebook App. However the menus may basically be the same as it is on desktop browser.
Step 1: Log in to your Facebook Account
The first step is to log in to your Facebook account using your desktop browser. Visit www.facebook.com and enter your email/phone number and password in the provided fields. Click on the “Log In” button to access your account.
Step 2: Switch to your Facebook Page
Once you’re logged in, click on your Facebook Profile picture (top right corner), and click on SWITCH.
This will allow you to switch to your Facebook page.
Select the Facebook Page that you want to delete.
If you have multiple pages, you will see them here. Select the appropriate page.
You can find your pages by clicking on the drop-down arrow in the top-right corner of the Facebook homepage. From the drop-down menu, select the page you wish to delete.
Now, Facebook will switch from your personal account to the Facebook page.
Step 3: Access Page Settings
After you have switched to the Facebook Page, click on the Facebook Profile picture for the Page (top right corner), and then click on SETTINGS & PRIVACY, and then click on SETTINGS.
The settings page will open.
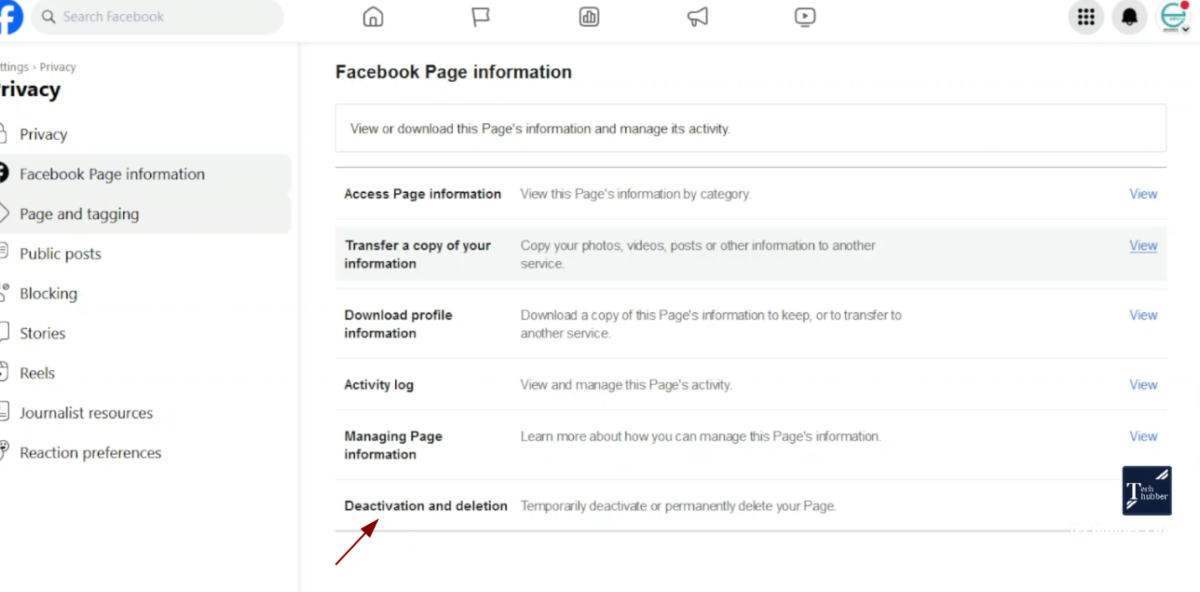
Next, click on PRIVACY, and then click on ‘Facebook Page Information‘ from the left sidebar.
Step 4: Delete Facebook Page
In the ‘Facebook Page Information‘, click on ‘Deactivation and Deletion‘.
Next, you are presented with two options – Deactivate Page or Delete Page.
Deactivation is temporary, and deletion is permanent.
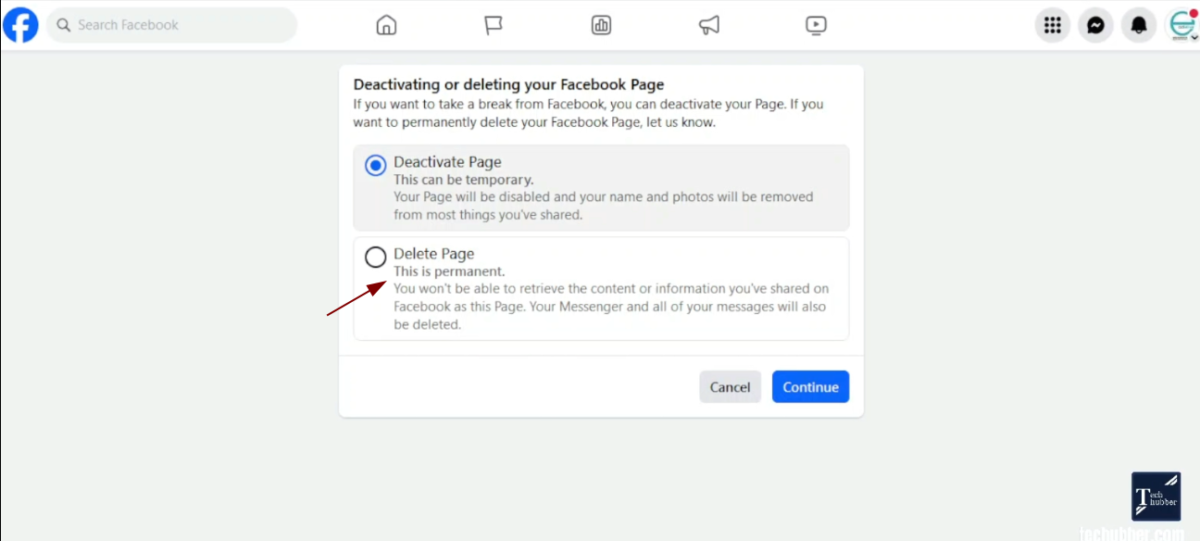
Since we want to delete the Facebook page, select delete page and continue .
Step 5: Backup / Download your Facebook Page information
Now you get an option whether you want to download Facebook information or not. If you want to download click on the download information button and follow instructions on the screen. After that click continue.
If you don’t want to download the information simply ignore this and click on continue.
Next you will be prompted to enter the Facebook account password.
Step 6: Confirm Facebook Page Deletion
A pop-up window will appear, asking you to confirm the deletion of your page. Read the information provided and make sure you understand the consequences of deleting your page. As you can see in the message, when you delete a Facebook page it is not immediately deleted, but it is deactivated first. Facebook gives you a grace period of 30 days to reactivate the page if you require.
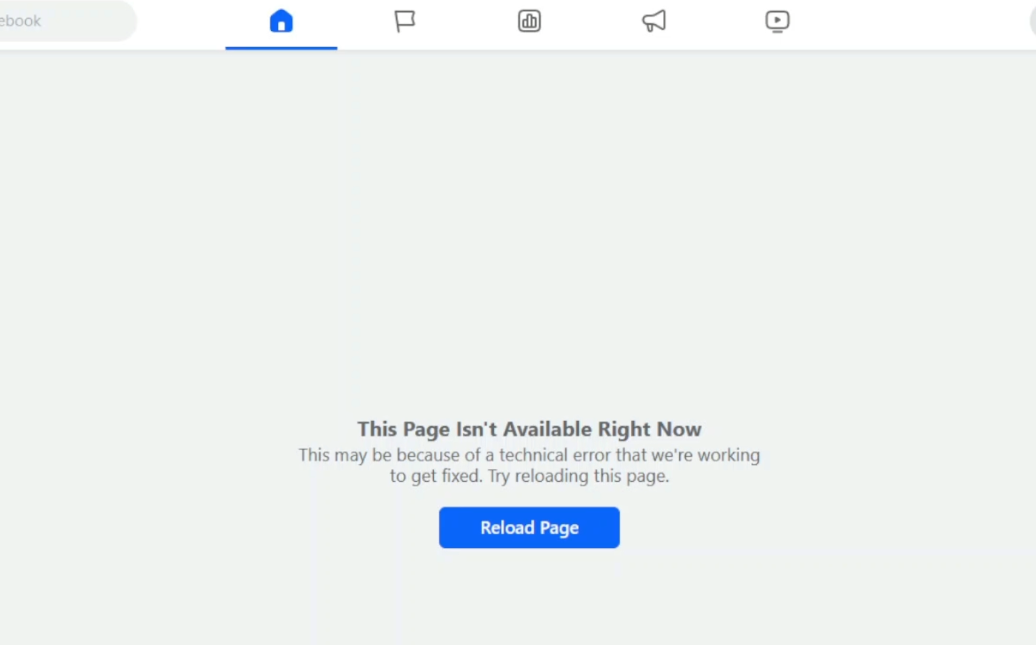
If you’re certain about deleting the page, click on the “Continue” button.
Facebook will now delete the page and you will see ‘The Page isn’t available right now‘.
Once the deletion process is complete, Facebook will send you a notification confirming the deletion of your page. You can also check if the page has been deleted by trying to access it through the URL or searching for it on Facebook. If the page no longer exists, it has been successfully deleted.
How to confirm if Facebook Page is deleted? How to reactivate a deleted Facebook Page?
Log in to Facebook, click on your Facebook Profile picture (top right corner), and click on SWITCH.
Facebook will show you all the pages that you manage. Normally, you are supposed to select the page but you will not be able to see the page which you just deleted.
Click on ‘See All Pages‘.
Here you’ll see all the pages that you manage. And the Facebook Page which you deleted earlier is visible on the right hand side under deactivated pages.
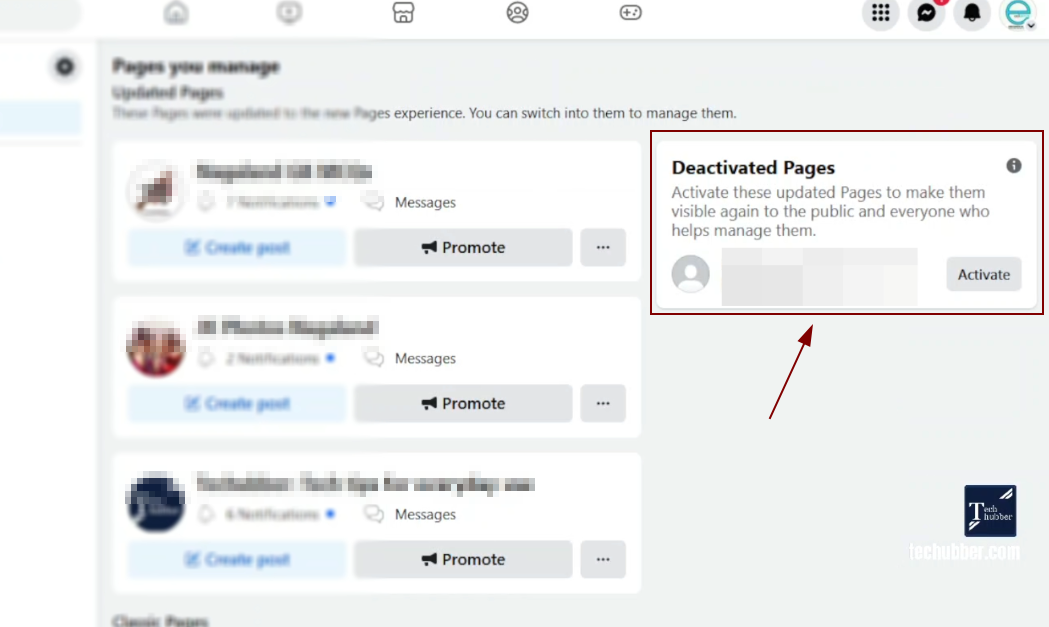
Near the deactivated page, you can also see ACTIVATE button.
Since Facebook gives you 30 days grace, to reactivate a Facebook page which you deleted, you can come back to this place (See All Pages) and reactivate the Facebook Page if required.
Conclusion
Deleting a Facebook page using a desktop browser is a simple process that can be completed in a few steps. By following the steps outlined in this article, you can remove a Facebook page that you no longer need. Just remember to carefully consider the decision before deleting your page, as the process is irreversible after the expiry of the grace period.


Leave a Comment (FB)