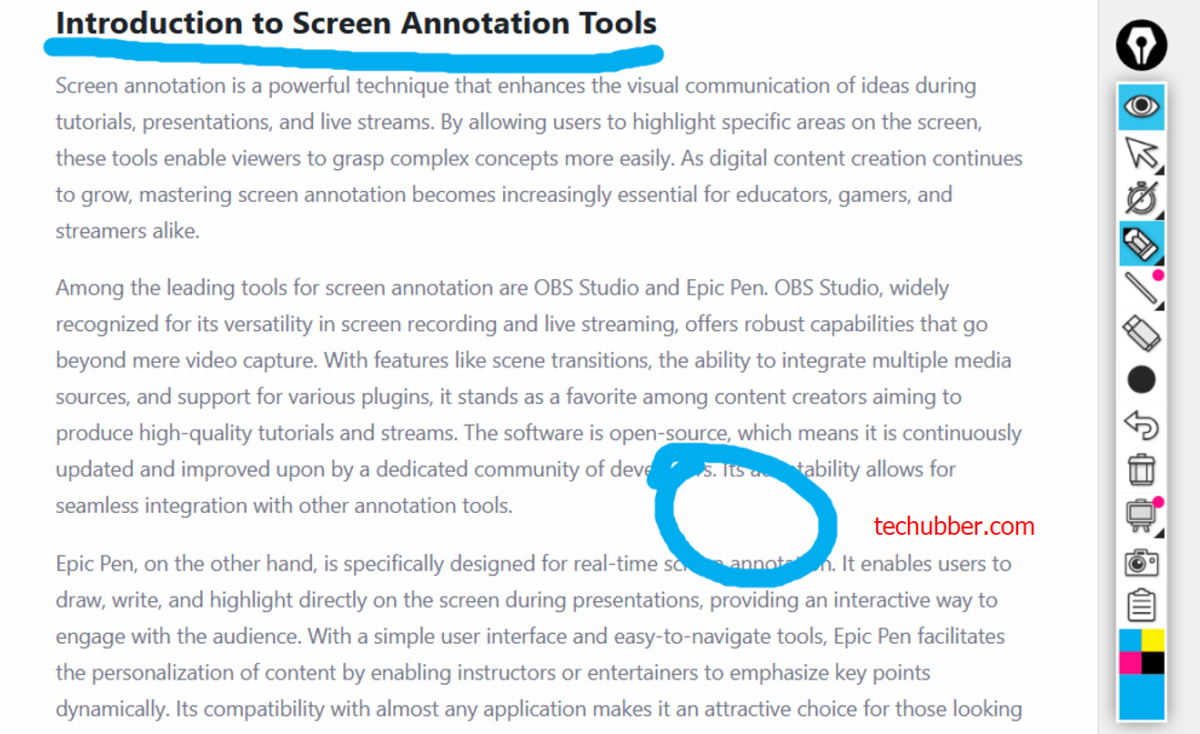
Screen annotation is an effective way to allows the presenter to highlight specific areas on the screen and enhance the visual communication allowing viewers to follow and stay engaged. If you make tutorials and instructional videos, you might have felt the need to annotate on screen recording. In the following paras, we are going to see how to annotate during screen recording using OBS Studio and Epic Pen. If you are asking ‘How to annotate with OBS?’, you are in the right place.
Table of Contents
About the tools:
- OBS Studio – screen recording software
- Epic pen – annotation tool
OBS Studio, short for Open Broadcaster Software Studio, is a popular screen recording software widely recognized for its versatility in screen recording and live streaming. With features like scene transitions, the ability to integrate multiple media sources, and support for various plugins, it stands as a favorite among content creators aiming to produce high-quality tutorials and streams. The software is free and open-source.
Epic Pen, on the other hand, is specifically designed for screen annotation. It enables users to draw, write, and highlight directly on the screen during presentations, providing an interactive way to engage with the audience. There is a free as well as Pro version. But for basic annotations, the free version is good enough, which comes with Pen, eraser & highlighter. You can use Epic Pen for annotate during screen recording with OBS Studio.
So, with OBS Studio for screen recording, and Epic Pen for annotations, you have the tools ready for making tutorials great again!
Download and Install OBS Studio for Screen Recording
First, begin by downloading the software from the official OBS Studio website. As an open-source application, it is available for Windows, macOS, and Linux, ensuring compatibility with a variety of operating systems. Once downloaded, simply follow the installation prompts to complete the setup.
Setting up OBS Studio for effective screen recording is a crucial initial step for anyone looking to create high-quality tutorials.
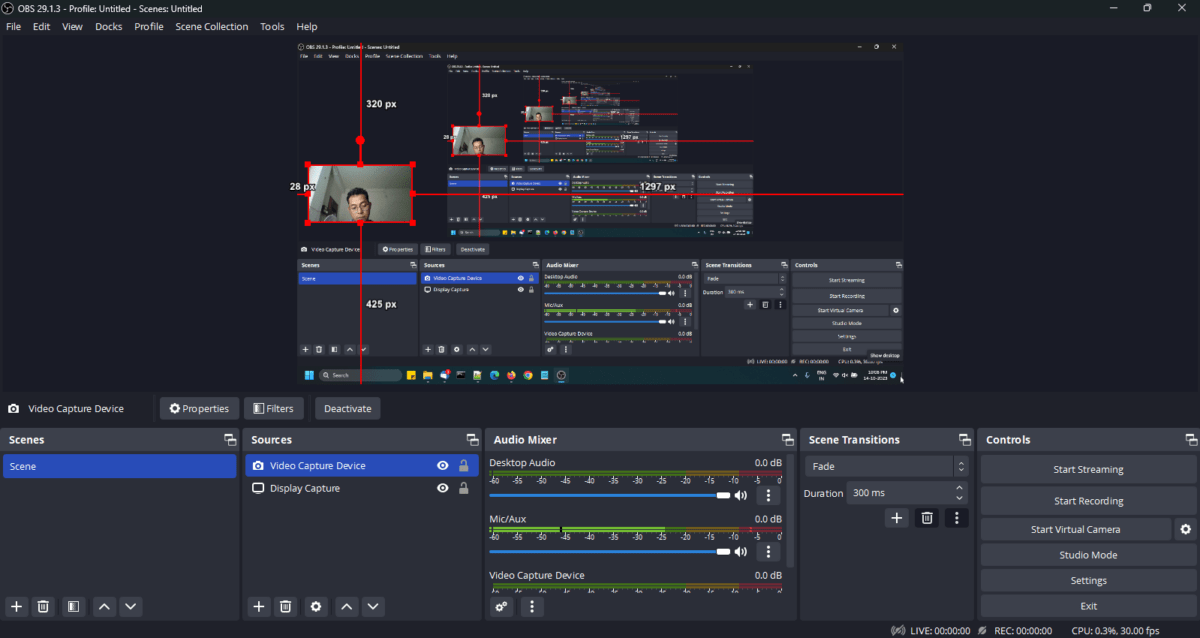
Upon launching OBS Studio for the first time, users will be greeted by a user-friendly interface, which may initially seem overwhelming. To ease the process, it is recommended to use the Auto-Configuration Wizard. This feature guides you through basic settings and helps identify optimal configurations tailored to your system performance and recording needs. You can access this wizard from the ‘Tools’ menu in the main toolbar.
Configure OBS display settings
Next, configure your display settings by navigating to the ‘Sources‘ panel. Click the ‘+’ button and select ‘Display Capture‘ to record your entire screen or ‘Window Capture’ to focus on a specific application. Adjust the capture area if necessary; this is particularly useful for creating tutorials that concentrate on specific software functionalities.
Enhance your recording setup further by defining the output resolution and frame rate in the ‘Settings’ > ‘Video’ section. Choosing the appropriate recording format is also vital for a successful recording experience. In the ‘Output’ settings, select your desired format, like MP4, which is widely compatible for sharing.
Ensure you also adjust audio input and output settings, allowing for clear narration and system sounds during your tutorials. By connecting a microphone and selecting it as the audio source, you can create a more engaging viewer experience.
By following this systematic approach to setting up OBS Studio, users can quickly begin their screen recording journey and capture dynamic content for their tutorials.
Download and Install Epic Pen for Screen Annotations
For screen annotation during screen recording with OBS Studio, we can use Epic Pen. Download Epic Pen and install it. You can go with the free version if your requirement are simple.
After installation, test the Epic Pen features.
How to capture Epic Pen annotations during screen recording using OBS Studio?
OBS Studio is for screen recording whereas the Epic Pen is for annotations. Ideally, the expectation is that the annotations should be captured during screen recording. But that is not always the case. Epic Pen annotations may not show on recordings. OBS Studio have to be configured appropriately for capturing the Epic Pen annotations on screen.
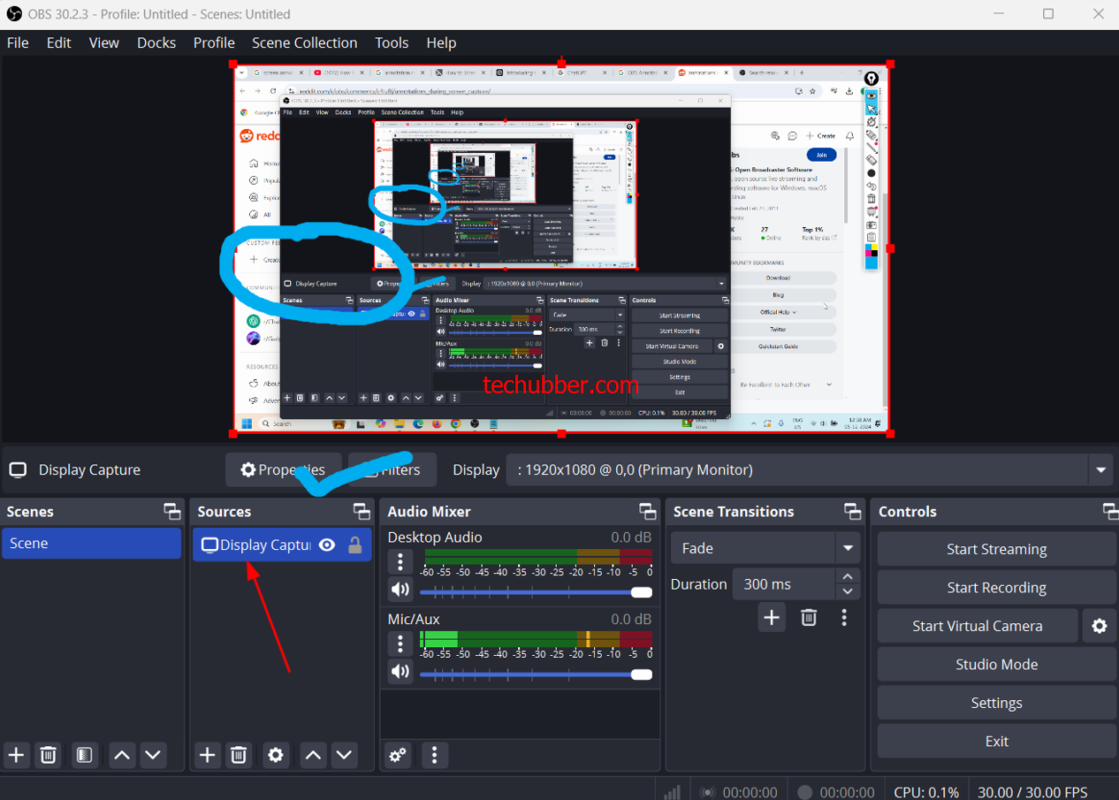
Option 1 : Capture entire screen to also capture annotations
In the ‘Sources‘ panel, click the ‘+’ button and select ‘Display Capture‘ to record your entire screen. By selecting ‘Display capture’, the entire display screen is captured, including the annotations. There is not additional settings required to capture the annotations.
Option 2 : Window Capture
If you do not wish to capture the entire screen, but only a particular window, then you’ll need to do some additional settings. When you do Window Capture in OBS Studio, the annotations will not be captured by default, as it is another layer.
- In the ‘Sources‘ panel, click the ‘+’ button and select ‘Window Capture‘.
- Next, select the window you want to capture – browser, notepad, any application window – select from the Window drop-down list.
Note: This will capture only the particular window – not the Epic Pen annotations. - Open Epic Pen program if not already open.
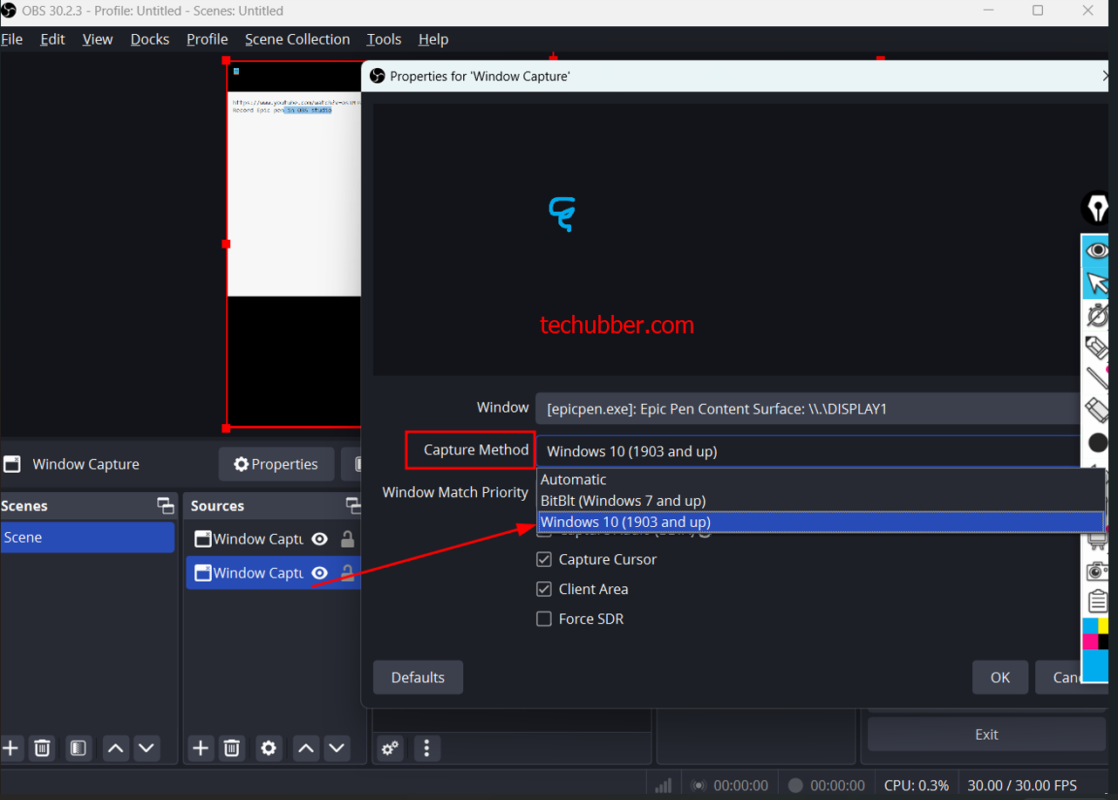
- In the ‘Sources‘ panel, click the ‘+’ button and select ‘Window Capture‘ again, and this time select Epic Pen Content Surface:\\.\Display1, and then click OK.
- Test recording and try to annotate on screen.
You might notice that you are getting a complete black screen or some unusual lines instead of the annotations. - Go back to OBS Studio, and right click on the Window Capture for the Epic Pen, and click on Properties. Change the capture method to Windows 10 and up. Click Ok.
- Test by recording again and try out some annotations. This time, your annotations should be captured.
- If your screen recording is still black, and the window to be captured is not visible, though you can see the annotation, then you can add a Chroma key also.
- Right click on the Window Capture for the Epic Pen > click on FILTERS > Add Chroma Key > Set ‘Key Color Type’ to ‘Custom Color’, and also lower ‘Similarity’.
- This will make the other window being captured also visible.
Conclusion
Likewise, if you need to record screen for making tutorials and instructional videos, you can use OBS Studio which is a free cross-platform screen recording software and Epic Pen for annotations.
As discussed above, if you are recording full screen or the entire display, then you only need to add ‘Display Capture’ in the sources. Whereas, if you are capturing a particular window such as a web browser, then you can add Window capture for the Epic Pen also.
Finally, reviewing and editing your recorded footage before publication is essential to ensure that annotations serve their intended purpose.
If you found this article useful, please like, share and let us know in the comments. If you have any queries, do let us know in the comments too.
# Screen Recording Software
# Annotation during screen recording
# Annotations not recorded
# Epic Pen annotations not showing on recordings
# How to annotate with OBS?
# Screen annotation not captured in obs windows 10
# OBS draw on screen


Leave a Comment (FB)