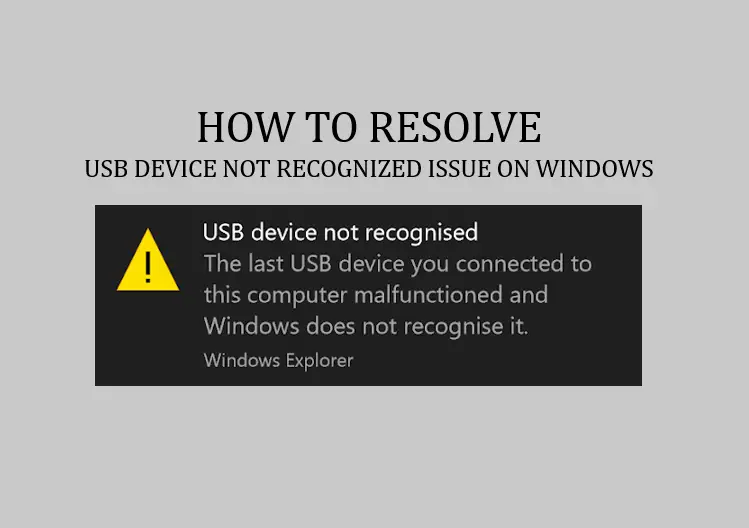
HOW TO RESOLVE USB DEVICE NOT RECOGNIZED ISSUE IN WINDOWS PC
If you’re experiencing a “USB Device Not Recognized” issue on Windows 11, it can be frustrating. That’s when your USB device stops responding, whether the device is a USB Mouse or USB keyboard or something else. But there are several steps you can take to resolve the problem. Here’s a step-by-step guide to help you troubleshoot and fix the USB device not recognized issue in Windows PC.

Steps to resolve USB device not recognized issue in Windows PC:
Table of Contents
1. Check the USB Device – Is it faulty?
The “USB device not recognized” issue in Windows may occur if the USB device is faulty or not in a proper working condition. So Windows does not recognize the USB device attached to the computer.
To confirm whether the USB device is actually faulty, you can test it on another computer. If it is not working on the other computers you tested with, then the USB device may be faulty. Otherwise, if it is working fine on the other computers, then probably it is a problem with your computer. In that case, you can go ahead with the other troubleshooting steps below.
2. Try a Different USB Port
Sometimes, the issue may be related to a specific USB port on your computer. Plug the device into different USB ports to see if it gets recognized.
3. Restart Your Computer:
Sometimes, a simple restart can often resolve minor computer issues. Reboot your computer and check if the USB device is recognized.
If the “USB device not recognized” issue is due to some underlying issue, the issue may reappear again.
4. Check for Viruses and Malware / Update Windows
Sometimes, malware can interfere with USB functionality. Before you try complicated troubleshooting steps and pull your hair out, it is a good idea to run a full system scan using your antivirus software to ensure that it is not virus or malware that is causing the “USB Device Not Recognized” issue on Windows 11.
Also ensure that your Windows 11 is up to date with the latest updates and patches. Microsoft frequently releases updates that may include USB-related bug fixes.
Update Windows Update from “Settings” > “Windows Update” and click “Check for updates.”
5. Update USB Drivers
If you are getting “USB device not recognized” error, the next thing you can try is to check if the drivers need to be updated. Outdated or corrupt USB drivers can cause the “USB device not recognized” issues.
You can update your USB drivers by following these steps:
– Right-click the “Start” button and select “Device Manager.”
– Expand the “Universal Serial Bus controllers” section.
– Right-click each USB Root Hub, USB Host Controller, and USB Composite Device, and select “Update driver.”
– Follow the on-screen instructions to search for and install updated drivers (Search Automatically for driver).
If there are driver updates available, those will be found and installed. If not, ” The best drivers for your device are already installed” will be displayed.
6. Uninstall USB Devices:
If updating the drivers doesn’t work, you can try uninstalling the USB devices, and let Windows reinstall them.
– Right-click the “Start” button and select “Device Manager.”
– Expand the “Universal Serial Bus controllers” section.
– The USB device that is not recognized, will have some identification mark- like a yellow exclamation mark.
– Right-click the USB device that’s not recognized and select “Uninstall device.”
– Unplug the USB device and then plug it back in. Windows should attempt to reinstall the device.
Check if that resolves the issue.
If the “USB device not recognized” issue is due to some underlying issue, the issue may reappear again.
You may right-click any device and update / disable / enable /uninstall device from the Device Manager as shown in the screenshot below for illustration.

7. Reset USB Root Hub
You can also try disabling and re-enabling the USB Root Hub to reinitialize the USB ports.
– Right-click the “Start” button and select “Device Manager.”
– Expand the “Universal Serial Bus controllers” section.
– Right-click the USB Root Hub and select “Disable device.”
– Wait a few seconds, then right-click it again and select “Enable device.”
Check if that resolves the issue.
If the “USB device not recognized” issue is due to some underlying issue, the issue may reappear again.
8. Reinstall USB Controllers
You can also try to uninstall and reinstall all USB controllers.
– Right-click the “Start” button and select “Device Manager.”
– Expand the “Universal Serial Bus controllers” section.
– Right-click each “USB Root Hub” and select “Uninstall device.”
– Restart your computer, and Windows should reinstall the USB controllers.
Check if that resolves the issue.
If the “USB device not recognized” issue is due to some underlying issue, the issue may reappear again.
9. Check Power Management Settings:
Some power-saving settings can cause USB devices to disconnect or not be recognized.
– Right-click the “Start” button and select “Device Manager.”
– Expand the “Universal Serial Bus controllers” section.
– Right-click the USB Root Hub and go to “Properties.”
– Under the “Power Management” tab, uncheck “Allow the computer to turn off this device to save power.”
Check if that resolves the issue.
If the “USB device not recognized” issue is due to some underlying issue, the issue may reappear again.
10. Fix for “USB Device Not Recognized” – “Device Descriptor Request Failed” on Windows 11
If you have tried all the other steps but you are still getting the “USB Device Not Recognized” issue, and you also see the “Device Descriptor Request Failed”, then follow the steps below to solve the issue by editing the registry.
Make sure you have tried all other steps to fix the “USB Device Not Recognized” issue without manually editing the registry. Otherwise, you may try the steps below.
– Right-click the “Start” button and select “Device Manager.”
– Expand the “Universal Serial Bus controllers” section.
– The USB device that is not recognized, will have some identification mark- like a yellow exclamation mark.
– Right-click the USB device that’s not recognized and select “Properties” > “Details Tab”.
– Click Property drop-down, and select “Device Instance Path” > Right click and copy the value.
Example: Device Instance Path = 5&2b5dd379&0&3
Now open Registry Editor:
– Press Windows Key and type “regedit” > click on “Registry Editor“.
– Click on the menus on the left and go to Computer\HKEY_LOCAL_MACHINE\SYSTEM\ ControlSet001(this may vary on your computer)\Enum
– Click on the current path address just below the top menu and paste the “Device Instance Path” you copied earlier + append “\Device Parameters“.
Now the registry path address will look something like this:
Computer\HKEY_LOCAL_MACHINE\SYSTEM\ControlSet001\Enum\USB\VID_0000&PID_0002\5&2b5dd379&0&3\Device Parameters
– Hit enter. This will take you to the exact path in the registry of the faulty USB device.
– Right-click in an empty space > click NEW > click DWORD > Name it “EnhancedPowerManagementEnabled“.
– Double click on the “EnhancedPowerManagementEnabled” newly added and make sure the value is 0.

– You may close the registry window after this.
– Restart the computer and check whether the “USB Device Not Recognized” issue is fixed.
Conclusion: If you’ve tried all these steps and the USB device still isn’t recognized, there may be a more complex issue at play. In that case, you may want to consult with a professional or your computer’s manufacturer for further assistance.
If you faced the USB Device Not Recognized issue on your computer and you were able to fix it, let us know which step helped you to fix the issue. Or if you fixed the issue using some other steps. Do let us know in the comments.
# USB Device Not Recognized
# USB Device Not Recognized when USB mouse is plugged in
# USB Device Not Recognized mouse not working
# USB Device Not Recognized keyboard not working


Leave a Comment (FB)