Epson is a popular brand for printers and they come with a variety of features. Some are simple monochrome printers with no networking capabilities, whereas, there are models with wireless capabilities. Epson printers allows you to easily set up WiFi network connection. Setting up Epson printers using the WPS feature on your router is one way to do it, and most routers would have WPS, but in case your router do not have WPS or you do not want to use the WPS way, then this article is for you. In this post, we will discuss How to connect Epson Printer to WiFi network (Without Display and Without WPS)?
Some Epson printers comes with display, so it is easier – as you can navigate the menu to set up networking on the printer. However if your printer does not have display, then you cannot really see and do the setup. This is particularly for Epson printers with no display and if your wireless router does not have WPS.
The following steps assumes that you have already unpacked as per the procedure in the manual.
How to connect Epson Printer Without Display to WiFi network and Without using WPS?
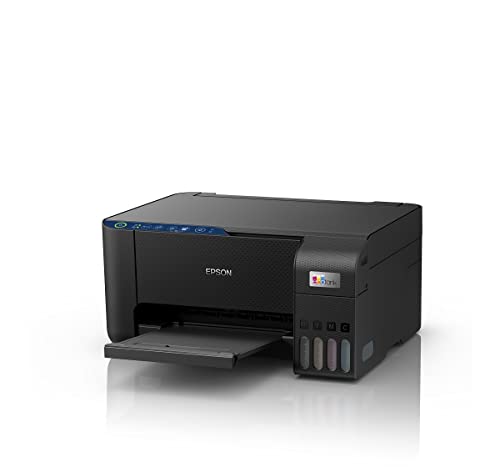
If you have an Epson printer without display and you want to connect Epson Printer to WiFi network without using WPS then follow the steps below. This post is relevant to Epson Wi-Fi Printer models such as L3250, L3251, L3252, L3256 which does not have display on the printers.
Here are the name of the Epson WiFi printer control buttons for reference ahead. These buttons may be similar on other models as well.

Steps to connect Epson Printer Without Display to WiFi network Without using WPS, follow the steps below:
1. Connect your Epson printer to power source and turn on the printer.
If this is the first time, then the power light flashes during ink initialization. Do not power off while it flashes.
2. Make sure the computer is connected to the same LAN / WiFi network.
3. Download and Install the Epson Printer software on your computer.
- The Epson printer software should be included in the package. However if you don’t have it you can download it from https://support.epson.net/setupnavi/ -where you can also get illustrated guide on how to setup your printer.
- Run the downloaded setup file.
- Followed instructions on-screen during the installation process.
- During installation steps, you will also guided to remove protective packaging, connect to power source, how to reveal your in tank etc.
- At some point during the software installation process, you will get two options how you want to connect to your printer :
- Connect via wireless network (WiFi)
- Connect via USB cable
Here choose “Connect via wireless network (WiFi)” If you want to connect to your absent printer wirelessly, and click NEXT.

The Epson software will do necessary checks and help you connect to the WiFi network.
Next, press the WiFi button on the printer for about 5 seconds until the WiFi indicator light and the WiFi direct indicator light blinks alternatively. Click NEXT.

This will start the WiFi setup process. You will see WiFi Auto Connect Printer Setup window.
Next, you will get “IP Address Settings“page where you need to choose Automatic Configuration DHCP or Manual configuration (Static Address).
You can go ahead with the automatic configuration, that is DHCP, which means that the router will assign IP address automatically to the printer. You may choose the manual configuration if you know what you’re doing, that is, if you want to set static IP address to your printer.
Choose automatic configuration (DHCP) and click NEXT.

The software setup will run further. Next, you will be asked to install some additional software such as scanner utilities, Epson Photo+, Epson Smart Scan etc. You may choose as per your requirements.
Finally, the setup completes and you can now print a test page to the printer.
If everything went well, the test page print command should work, and you should get a test page printed on your Epson WiFi printer.
This completes the steps required to connect Epson printer to Wifi. Now you can print from any computer or mobile device connected to your WiFi. To print from an Android mobile device, download the Epson iPrint app from Google Play.
Related Articles:
- How to Print from Android Phone to Epson Printer Wirelessly
- How to connect Epson Printer to WiFi network (Without Display and Without WPS)?
If you’re looking for some affordable Epson WiFi printers with ink tank, then you can check out Epson WiFi Printers on Amazon for best deals!
Some are listed below.

# How to connect to Epson printer WiFi
# How to print to Epson printer wirelessly
# WiFi Printers from EPSON
Leave a Comment (FB)