Epson Inkjet Printer Maintenance is a crucial aspect of ensuring the longevity and efficiency of your printing equipment. Regular upkeep can prevent breakdowns, improve print quality, and extend the lifespan of your printer.
Table of Contents
But how do you know when it’s time to perform printer maintenance?
- Poor Print Quality – streaks, smudges, horizontal or vertical lines or faded text and images. These issues are often caused by clogged nozzles, dirty print heads, or low ink levels. Regular cleaning and checking ink or toner levels can mitigate these problems, improving overall print performance.
- Paper Jams – Frequent paper jams are a clear sign that your printer needs attention. Misfeeds and jams can result from worn-out rollers, improper loading, or debris inside the printer. Conducting routine internal cleaning can reduce the occurrence of paper jams and keep your printer running smoothly.
- Unusual Noises – If your printer produces unusual noises, it’s vital to investigate immediately. Sounds like grinding, squeaking, or rattling may indicate mechanical issues or the need for lubrication.
How to open Epson Printer Maintenance Options?
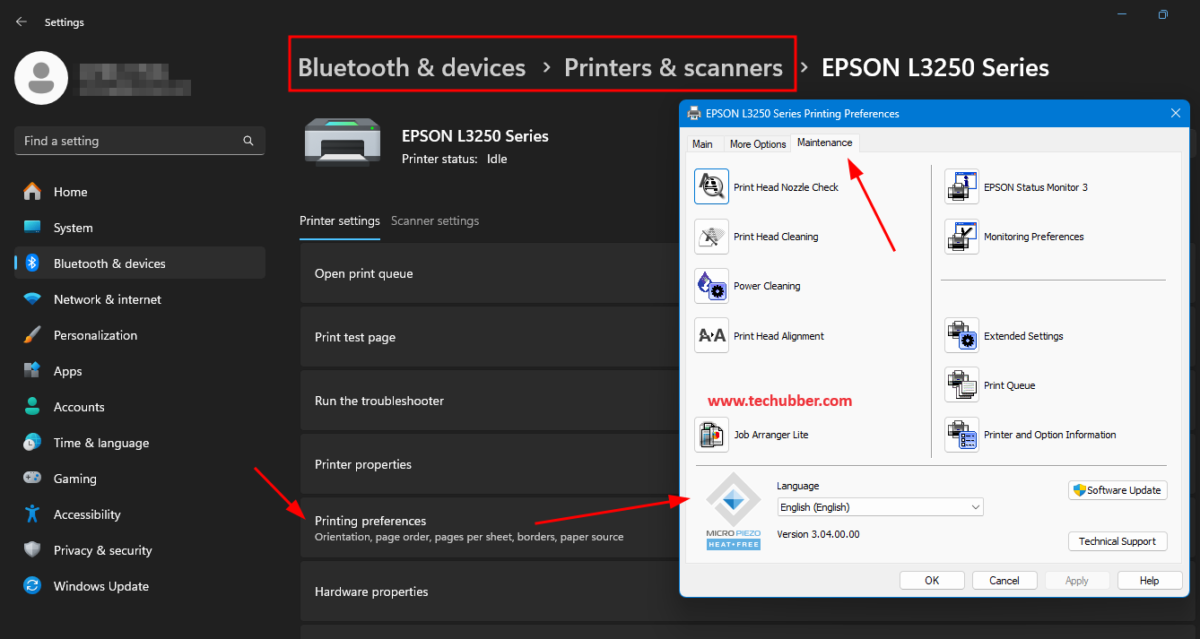
Steps to open Epson Printer Maintenance Options:
1. Open the start menu on your computer and find the ‘Devices and Printers‘ section.
2. Locate your Epson printer from the list of connected devices and click on its icon.
3. Select ‘Printing Preferences‘ from the context menu.
4. This will open the ‘Epson Printer Printing Preferences‘ windows.
5. Click on the ‘Maintenance‘ tab to access the different maintenance options available for your Epson printer:
– Nozzle Check: Ensures that the ink is flowing correctly.
– Print Head Cleaning: Clears obstructions in the printer’s nozzles.
– Print Head Alignment: Aligns the printer’s heads to improve print quality.
Running Maintenance Tasks
After selecting the appropriate maintenance option, follow the on-screen instructions to perform the task. It is advisable to regularly carry out these maintenance tasks to keep your printer in excellent working condition. For example:
– Perform a nozzle check if you notice lines or gaps in your prints.
– Run print head cleaning if the print quality starts to decline.
– Align the print heads if the prints are coming out uneven.
Conducting a Print Head Nozzle Check on Epson Printer
To maintain optimal performance of your Epson inkjet printer, conducting regular print head nozzle checks is essential. This process ensures the nozzles are free from clogs and capable of producing high-quality prints. Here’s a step-by-step guide on how to perform a print head nozzle check and interpret the results.
- First, ensure your printer is powered on and has paper loaded in the tray.
- Access the printer’s maintenance options through the control panel or the Epson software installed on your computer.
- Navigate to the ‘Print Head Nozzle Check’ function and initiate the check.
- The printer will produce a test page with a series of patterns.
Upon reviewing the test page, you should see a series of lines and blocks. If the print head nozzles are functioning correctly, these lines will be continuous and the blocks fully filled.
However, if you notice any gaps, breaks, or missing segments in the lines, this indicates that the print head nozzles may be clogged or misaligned.
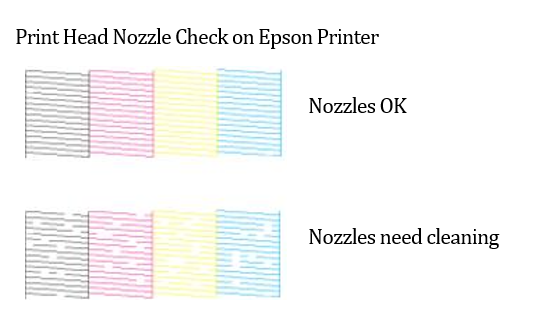
Common issues identified through a print head nozzle check include horizontal or vertical gaps in the printed lines, which suggest that certain nozzles are blocked. Additionally, streaks or blurred sections can indicate that the nozzles are not firing correctly. Understanding these patterns is crucial for diagnosing and resolving print quality issues.
If the print head nozzle check reveals any irregularities, it is advisable to proceed with a print head cleaning.
This can often be done through the same maintenance menu used to conduct the nozzle check. Regularly performing these checks helps keep your Epson inkjet printer in good condition, ensuring consistent and high-quality print outputs.
Performing Print Head Cleaning on Epson Printer
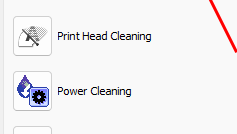
Addressing print quality issues often begins with performing a print head cleaning. This process is essential when the nozzle check identifies clogs or gaps in the print head.
To initiate the cleaning, access the Epson printer software on your computer. Navigate to the ‘Maintenance‘ tab and select ‘Head Cleaning‘. Follow the on-screen prompts to start the process.
The print head cleaning usually takes a few minutes. During this time, the printer will use a small amount of ink to clear any blockages in the nozzles. It is crucial to avoid turning off the printer or disconnecting it from the power source during this operation, as it may cause damage.
If the initial cleaning does not resolve the issue, it is advisable to perform a second round of cleaning. However, excessive cleaning cycles can lead to significant ink wastage. To minimize ink consumption, consider running a ‘Nozzle Check’ after each cleaning cycle to assess improvement. If the problem persists after two or three cleaning cycles, it might be necessary to perform a ‘Deep Cleaning‘ or consult with Epson support for further assistance.
Moreover, regular maintenance can help reduce the frequency of print head cleanings. Using the printer frequently, at least once a week, helps prevent ink from drying and clogging the nozzles. Additionally, ensuring that the printer is turned off properly and covered when not in use can protect it from dust and other contaminants.
By following these steps, you can effectively manage your Epson inkjet printer’s maintenance needs, ensuring optimal print quality and extending the life of your printer. Regular monitoring and timely interventions are key to preventing more significant issues down the line.
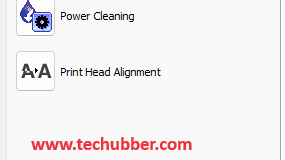
Power Cleaning on Epson Printer
Power cleaning is a more intensive maintenance procedure for Epson inkjet printers, utilized when standard head cleaning fails to resolve print quality issues. This advanced method clears particularly stubborn clogs in the printhead nozzles, ensuring optimal ink flow and print quality. It is crucial to understand both the process and potential risks involved before proceeding.
To initiate a Power Cleaning on Epson Printer, begin by accessing the printer’s maintenance menu. Navigate to the maintenance or utilities section, and select the “Power Cleaning” option. Confirm your selection when prompted, and the printer will commence the cleaning cycle. This procedure may take several minutes and will consume a significant amount of ink.
It is important to note the potential risks associated with power cleaning. Due to the intensive nature of this procedure, it can rapidly deplete your ink cartridges. Frequent power cleaning can also contribute to wear and tear on the printhead, potentially shortening its lifespan. Therefore, it is advised to use this option sparingly and only when absolutely necessary.
After completing the power cleaning, monitor the results by printing a test page. This will help you determine if the cleaning process successfully resolved the print quality issues. If the print quality remains unsatisfactory, you may need to repeat the power cleaning. However, if multiple attempts do not yield improvement, it may be indicative of a more serious issue requiring professional servicing or replacement of the printhead.
Epson Printer Head Alignment
Aligning the print head is a crucial maintenance task that ensures optimal print quality for your Epson inkjet printer. Print head alignment is necessary to correct any misalignment that may occur over time due to regular usage or after replacing the ink cartridges. Misalignment can lead to issues such as blurred lines, color bleeding, and overall poor print quality.
Symptoms of a misaligned print head :
- horizontal lines appearing out of place,
- colors not lining up correctly,
- and text or images appearing blurry.
To person Epson Printer Head Alignment, follow these steps:
1. Turn on your Epson printer and ensure it is connected to your computer
2. Navigate to the ‘Setup’ or ‘Maintenance’ menu on the control panel.
3. Select ‘Print Head Alignment’ and follow the on-screen instructions to print an alignment sheet.
4. Examine the printed alignment sheet and select the pattern that best matches the alignment guide provided in the printer’s manual.
5. Confirm your selection to complete the alignment process.
Visual aids, such as alignment pattern samples, are typically included in the printer’s manual or software to guide you through this process. Ensuring proper print head alignment will maintain the high-quality output of your Epson inkjet printer, allowing for crisp and clear prints every time.
Check out Epson WiFi Printers on Amazon!

Maintaining Your Epson Inkjet Printer for Longevity
Proper maintenance of your Epson inkjet printer is essential to ensure its longevity and optimal performance. A routine maintenance schedule is crucial to avoid common issues such as clogged print heads, paper jams, and ink smudges. By following a few straightforward practices, you can keep your printer running smoothly for years to come.
First, it is advisable to establish a regular maintenance schedule. Depending on the frequency of use, conducting a comprehensive cleaning at least once a month can significantly improve the lifespan of your printer. This includes running the printer’s built-in cleaning cycle, which helps to clear any dried ink from the print heads. Additionally, checking for firmware updates periodically can help maintain the printer’s efficiency and compatibility with new software.
Always use genuine Epson ink cartridges, as third-party alternatives may cause damage or inconsistent print quality. Store unused cartridges in a cool, dry place, and keep them sealed until they are ready for use. When replacing cartridges, handle them carefully to avoid any spills or leaks that could damage the printer’s internal components.
Keeping the printer in a dust-free environment also plays a vital role in its maintenance. Dust and debris can accumulate on the print head and other sensitive parts, leading to malfunctions. To prevent this, place the printer in a clean area and cover it with a dust cover when not in use. Regularly wiping the exterior with a soft, lint-free cloth can also minimize the build-up of dust.
Finally, remember to use the printer regularly. Infrequent use can lead to ink drying up in the nozzles, causing blockages that are difficult to clear. Printing a page or two every week helps keep the ink flowing and the print heads in working condition.
By adhering to these maintenance tips, you can ensure that your Epson inkjet printer remains reliable, efficient, and long-lasting.
Leave a Comment (FB)