There are various reasons why you may want to clone your hard disk. You can do it using software or using hard disk cloning hardware. In this post, we will discuss how to clone hard disk offline using PiBOX Dual Bay USB 3.0 Hard Drive Docking Station with Hard Drive Duplicator Offline Clone for 2.5 or 3.5in HDD / SSD.
Table of Contents
What is hard disk cloning
Hard disk cloning is a process that involves creating an exact replica of a hard disk drive (HDD) or solid-state drive (SSD). This technique is essential for various applications including data migration, upgrading to a larger disk, or recovering from a system failure. Unlike traditional backups that store files separately, cloning captures the entire disk structure, including the operating system, applications, and settings, enabling users to restore their systems swiftly in case of data loss.
Cloning allows users to bypass the time-consuming process of reinstalling software and re-configuring settings, thereby simplifying transitions.
Scenarios when hard disk cloning may be required
Common scenarios where cloning can be beneficial include:
- Hard disk upgrade
- Replacing HDD to SSD for improved performance,
- Having a reliable backup solution during system upgrades.
Items required for offline hard disk cloning (items used in this demo)
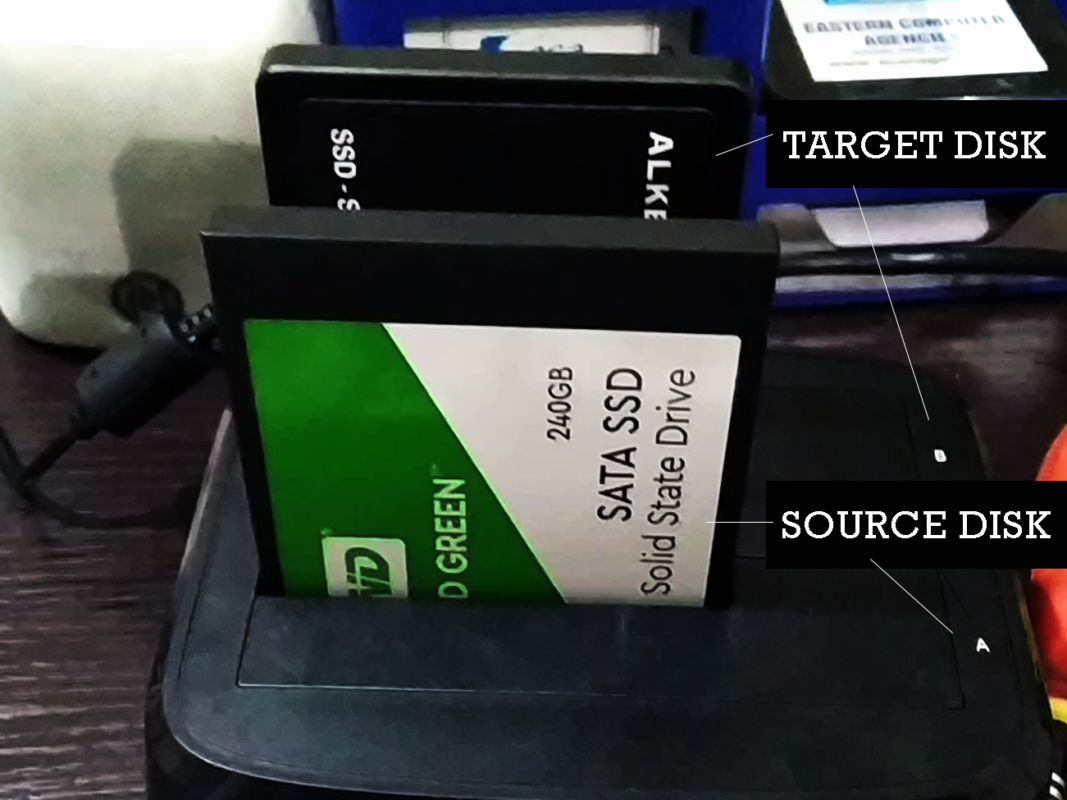
- Source HDD (in this case Western Digital 240 GB SSD)
- Target HDD (in this case Alketron 512 GB SSD)
- Offline Hard Disk Cloning Device : PiBOX Dual Bay USB 3.0 Hard Drive Docking Station with Hard Drive Duplicator Offline Clone for 2.5 or 3.5in HDD / SSD
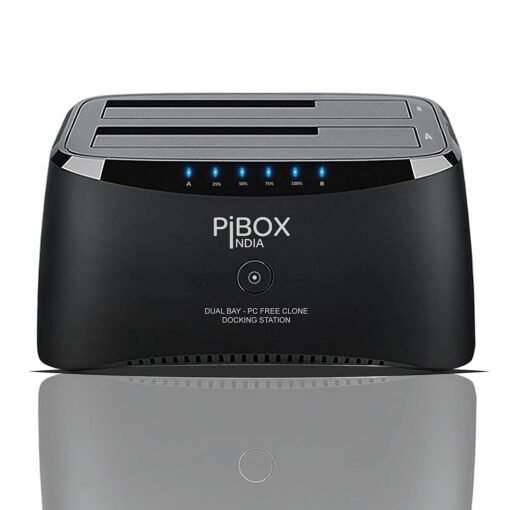
PiBOX Dual Bay USB 3.0 Hard Drive Docking Station with Hard Drive Duplicator Offline
USB 3.0 to SATA Dual Bay Dock – Support all SATA I/II/III 2.5” and 3.5” external SSD HDD drives
Dual Bay Fast Offline Clone without PC
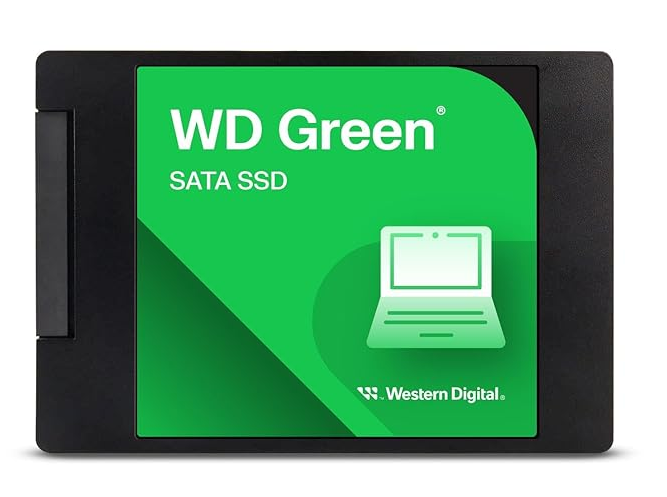
Western Digital WD Green SATA 240GB SSD
Features of the Pibox Offline Hard Disk Cloning and Docking Station
The Pibox Offline Cloning and Docking Station is a must-have accessory if you need a hard disk docking station which you can also use for hard disk cloning also when required.
- USB 3.0 to SATA Dual Bay Dock
- Support all SATA I/II/III
- Compatible with 2.5” and 3.5” external SSD/HDD drives
- Plug and play, no driver needed
- Hot-swapping
- Supports Offline Hard Disk Cloning, without PC
How To Clone Hard Disk Offline (Demo Using PIBOX)
Cloning your hard disk can be a daunting task, but with the Pibox Offline Cloning and Docking Station, the process becomes significantly more manageable. This guide will take you through each step, allowing you to clone your hard disk safely and efficiently.
Before commencing the cloning process, ensure that you have all necessary materials at hand, including:
- the Pibox unit,
- a target hard disk (the disk you want to clone to), and
- the source hard disk (the disk you want to clone), which you will need to remove from the computer to use offline with the PiBox.
It is essential to verify that the target disk has sufficient space to accommodate all the data from the source disk. The target hard disk should be of higher capacity than the source disk.
Demo Video: How to Clone Hard Disk using PiBox Offline Hard Disk Cloning
Watch this demo video on how to Clone Hard Disk using PiBox Offline Hard Disk Cloning. Or read the step by step instructions below the video.
Step 1: Insert the Source Disk into Bay A, and the Target Disk in Bay B.
Ensure it is securely connected.
Step 2: Power on the PiBox
Connect the Pibox unit to a power source, and powered on.
The HDD Bay LED indicators illuminate. The dock is ready to perform the cloning process.
Confirm that both drives are detected by checking the display or indicator lights on the device.
Step 3: Start the Disk Cloning Process
Press and hold the clone button for about 3 seconds until the LED indicator lights starts blinking. Press the clone button once more for clone confirmation.
Offline clone process is now initiated.
The Pibox will display a progress indicator, allowing you to monitor the status of the cloning operation. There are LED indicators present to indicate the progress of the cloning process at 25%,50%,70%,and 100%. During this phase, it is important to avoid interrupting the process by disconnecting the power or the drives, as this may lead to incomplete cloning or data loss.
After the cloning process is complete, the Pibox will notify you – the LED indicators illuminates and buzzer sound is hear.
Step 4: Turn off the power.
At this stage, safely remove both hard disks.
Step 5: Verify the clone
To verify that the clone was successful, keep the target disk in any of the bay, and power on the PiBox. Plug the USB cable provided with the PiBox to a computer. The hard disk should be detected and you can explore the files directly in Windows Explorer.
To view the partitions in details, you can open Windows Disk Management utility (Right-click on Start Menu > Disk Management) and you will be able to see the partitions on the disk, including the system reserved partitions.
Following these steps will ensure a seamless cloning experience with the Pibox Offline Cloning and Docking Station.
Note: If you have both the target and source disk are in the Pibox bays and you connect to a computer, only one of them will be detected. This is not an error.
Since both the disks are now identical, only one which is in Bay A will be detected and the other one will be offline due to conflict in device signature. You can see this in Windows Disk Management utility also.
After verifying that the cloning process is successful, you can now take that target hard disk and install it on your computer, if that was the purpose of the hard disk cloning.
After completing the cloning process, users should always check to ensure that the cloned disk functions correctly. This verification can include booting from the new hard disk or using disk management tools to compare the data from both disks. If discrepancies are found, repeating the cloning process may be necessary. In cases where users continue to experience issues or encounter complex errors, seeking professional assistance can be the most effective solution.


Leave a Comment (FB)